Sunday, January 14, 2018

Friday, March 3, 2017

More Alice


A new addition to the Alice themed room. A hand painted door.


Second homecoming mum-with a hint of Alice.
Freshman-single mum
Sophmore-double mum (my daughter is not into big mums so this 
mum has a subtle black and white mum).

Thursday, November 3, 2016

Football Battle

Good luck cupcakes to our rival school friends. 
Freshman team Steele vs. Clemens 


Sunday, October 30, 2016

Friendly Homecoming Mums

Homecoming mums for good friends. One garter and one mini mum. These were fun to do. Of coarse this is our rival High School-but no worries, we sneaked in a Steele ribbon on the garter for my daughters friend.

First Homecoming Mum 2015


 Okay, so my last post I stated I was gonna get on my feet with some music. I have not yet to get up from my chair. UGGGGG. I found this picture of the mum I did last year and realized I was gonna be doing another one this year. Great-another project on my list that is going to take brain space. Homecoming may be months away but as I said before-I'm still in my chair. This mum thing is gonna come before I know it.  This was my first mum and on pinterest it only takes a few hours to create a masterpiece--hahaha, whatever-this took me days. And that's because I'm a pretty crafty and artsy person. This year should be better. Fingers crossed.

From the Past


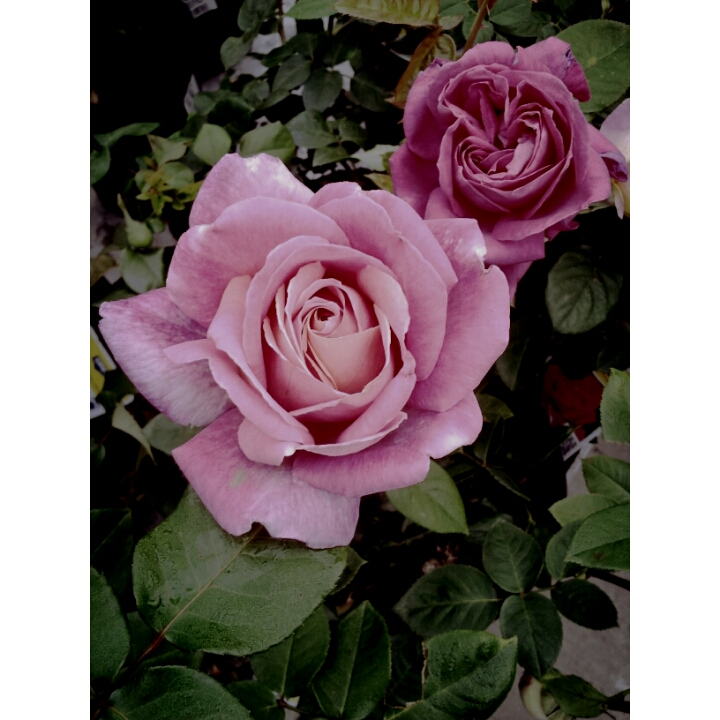
The lonely rose. Taken at work when I was a plant vendor.

  
Sweet smelling.


I had never seen such large bees 
before. Beautiful.


Wednesday, March 4, 2015

Wasabi Ginger Lays

I wasn't too much into the hype of the new flavors flying around-some just sounded gross. I love sushi and always get extra ginger with spicy mayo. Oh boy, I want sushi now. Well, when I saw these I bought the 6 pack that came with 2013 and 2014 winners. 2013 winner was some cheesy garlic bread-I haven't even gone there. So, I open this tiny bag and the smell of wasabi and ginger came out strong. Hmmmmm-I took a bite and another and another-EMPTY bag. AAAHHHH...I need a bigger bag. I am so in love with this flavor. Now, I know everyone has there opinions-and I don't dog others-so don't dog mine. I love them. Way to go on this one.

Saturday, September 21, 2013

It's a Monsters Party

 
T-shirts made with vinyl cut from my silhouette...For the price of one t-shirt at the store, I was able to make four. So all that's not priced is the time--but it's fun and it made my daughter happy. 
Buckets contain the t-shirts and colorful goodies...Super easy when there's only a few girls-that's the way to go. 

Wednesday, September 11, 2013


Personal Collage


Simple Collage: Materials

Cardboard from any unused box-so the size does not matter.
 
Old magazines- I'm sure everyone has these lying around. Look for words or quotes that fit your personality and cut them out. Start arranging them on the cardboard to start sizing what else is needed. At this point-no adhesive is added. First get the arrangement you want. I take a picture when I'm done to use as a visual before gluing.


Adhesive-I used sticky tabs for this particular project to glue pieces, but I would recommend spray adhesive, glue or modpodge. If you do not have modpodge, then you can thin out glue with a small amount of water so its easy to brush on. After gluing the pieces on the cardboard, I let it dry for about 30 minutes. Then I brushed on a thin layer of modpodge across the collage to keep in tact.


Ribbon-I just taped the ribbon to the back to hang collage. 


Your Done!!
Sorry for the messy background..
 
Great project for kids to express how they feel about themselves.
This project gives them different skills to use and can be a great accomplishment.
 
Reading-cutting-gluing-arranging-patterns-sizing-colors-taping


Tuesday, September 3, 2013


Don't Throw Away Your Ribbon Spool


Okay, so if your like me-there is ribbon coming out your ears. For being a crazy crafter, one thing I do not have organized is my ribbons...or my scrap area either-but I like my mess.
BEING CREATIVE IS MESSY, AND I AM VERY CREATIVE
 
This is another craft project idea for our Girl Scout Troop to do...but I have to be honest-as I was sitting at the computer researching ideas for our troop, my 6 yr. old son starts rummaging through my ribbon box, which is just lying on the floor. He starts to tear and empty ribbon spool and that's where the idea came from. When I saw the little cardboard circle-I thought "that was in there". Duh...I am starting to think, with some imagination almost anything can be up cycled.
So here is where the project begins...I made the bracelet and then the necklace. The outer spool reminded my of a CD but not as sturdy. I looked up and hanging on my wall is about 100 beaded necklaces I had bought for another project. There-go, necklace.
So let's go through the bracelet process...there are many options in securing the bracelet but I used what I had on my desk at that moment..I will explain as I go. Since this was a spur of the moment project, the execution of the bracelet is a pretty rough one.
 

Here I have my inner spool, my ribbons and 2 sided sticky tabs. Now this craft tape I use for lots of things-so I already had it at reach on my table. 


Take off outer spool to reveal the inside circle and cut a slit down the middle. This cardboard is tough-so use a good pair of scissors or exacto knife. If using this as a kids project-let them tear apart the spool and an adult may need to make the cut.
 
 
Start to wrap from edge of spool. I used about 1 yd. of ribbon for this bracelet. I added a sticky tab to the inside and outside to secure ribbon. I started at the edge of the spool. Though, to get more coverage you can let ribbon hang at the edge and then fold in. Since I am using sticky tabs, this was not the best option for me to do. Another route would be using a hot glue gun. But I am thinking kid friendly right now.. But there are also glue dots for fabric that would work really well-which I have but like I said before-sticky tabs were already on  my desk.
 
 
There are three examples here...and there are three different sizes. The ribbon spools are the same sizes 15ft, but depending on the width of the ribbon will determine the size of the inner spool. My 12 year old can wear all three. They will not fall of the wrist. If the bracelet is opened to wide-the top middle of the bracelet will crease. The bracelet will not break or tear but there will be a little give. If this occurs add a bow-
 
 
There are so many possibilities for these tiny bracelets. Find the best way to secure your ribbon. I will surely make many more-but for now I think the sticky tabs or glue dots will work for our young Girl Scouts and older ones can use the hot glue gun with supervision...


Sunday, September 1, 2013

TYE DYE SHIRTS
 
My project is to find crafts the girls can do.
So I do them first then show them the idea.
Right now my projects involve recycling items and any thing we have on hand-no money should be spent on these projects (hopefully)
 
Found this idea on several pinterest sites...I thought it would be a great project for the Girl Scout Troop to do.  It's a nice way for the girls to get creative and design anything they want without the mess of dyes.
 
 Items needed: 
White T-shirt (white is preferred but I only had this green one on hand)
Sharpie Markers
Rubbing Alcohol
Rubber Band
Cup or jar (optional-different sizes)
Cardboard (put in between shirt so color will not bleed through)


I already have T-shirt boards, so that is what I  used to put in between the T-Shirt. But a recycled cardboard from a box will do great.  Put the cup or jar under the shirt and use the rubber band to keep in place. This method helps stretch the T-Shirt and makes it easier to draw but is not mandatory.  

 
Use markers to create a design. Draw a small design because it will spread. You can draw a bigger design but if it spreads to the edge of the cup, you will get a stencil look-of a circle, as you may be able to see in the bottom picture. No designs are wrong-you still get the surprise effect of tye dye but with a little control of the outcome .


Use a dropper or spray with alcohol to wet design and watch it spread...If it did not spread the way you liked-then just add more design and add more alcohol.


When done with designs let air dry then put in dryer to set...If T-Shirt is not dry when put into dryer, color may still stain other parts of the shirt. I am impatient so after each design I used the blow dyer.


This was the finally outcome.
It has a few swirls, a heart, the troop number and an initial.


Friday, August 30, 2013

 
Saving Pennies Project
for Girl Scouts


Great idea for the "Saving Pennies Fun Patch"
My daughter is the only Cadette in her group (which consists of 9 girls) so I became a girl scout as well to do special fun patch projects with her, when she is not able to get with her troop. She came up with this idea of "Penny Jars" to give to her troop so they could earn the fun patch also. The idea is to save pennies in the jar for several months. The girls will then come together at one of the meetings with their jars and count the collected pennies. This money will be used to buy their fun patch. Then they can continue to use the jars for other goals...but saving nickels, dimes or even quarters will also work depending on the goal at task.
 
Recycled jars (I used pasta jars)
Stickers ( I used my silhouette to cut vinyl)
Ribbon
Cut a slit on the lid for coins
And there is your Penny Jar...White tissue in jar was to give it a decorative look, but that is optional.


Thursday, March 21, 2013

Birthday Fun


My daughter's tradition for her best friend's birthday... every  year we find something fun to fill with all her favorite goodies. We personalized this bucket with cut vinyl using the silhouette machine font sybil green....


My daughter had a birthday party to go to and we had all the stuff but realized we had no bag--no fear, empty box in the pantry, some duct tape and a quick run through on the silhouette for personalization and whooohoo a finished product and a reusable box for the birthday girl too...

Friday, February 15, 2013

BarleyLife


Finally...got my barley life.
If you've read "A Fact About Me" then you'll understand why I'm excited. From what I have been told and read, this product is like juicing but without all the fuss. No juicer, washing products, weekly expense...and cleaning. There is about a months worth here of Barley Life and no wasting money on produce going bad... "why not" let's give it a try.


Chocolate Strawberries


HOW WAS YOUR VALENTINE'S
I made these strawberries for the family...so easy
sm. package of strawberries (approx. 26 pieces)
Chocolate-I use Wilton Candy Melt (found at Wal-Mart, Michaels or Hobby Lobby), it melts easy and stays creamy longer than normal chocolate.
Each bag is 12 oz. and I used about 6 oz. from each  bag (pink and brown)
Melt chocolate according to package.
I wash strawberries the day before so they are fully dried and ready.
Dip strawberries in melted chocolate and place on wax paper to dry. Wax paper helps to prevent chocolate from sticking to your fancy decor...when strawberries are dry (usually about 10 minutes) then strawberries are ready to be moved...if the kids don't eat them first.

Wednesday, February 13, 2013

Ravens

 
Ravens design my husband drew for our AWESOME soccer team-GO RAVENS


Boys Valentine Box


My sons Valentine Box...No pink hearts here.
Just a recycled cracker box, super mario duct tape and an x-acto knife to make the big slot...
Quick and easy, and I know he will be reusing this in his room...double points!!
Optional--which I did do-add his name in cut out letters or stickers.